Focaccia is a beloved Italian flatbread known for its moist, airy texture and olive oil-rich crust. Originating from the Liguria region, it's a versatile bread that can be served as a side dish, appetizer, or even used as a base for sandwiches. The beauty of focaccia lies in its simplicity and the endless variations one can create by topping it with herbs, sea salt, olives, sun-dried tomatoes, or onions.
Making focaccia is an excellent introduction to bread-making for beginners, providing a satisfying experience with a delicious result. It's perfect for dipping in soups, serving alongside pasta dishes, or simply enjoying with a drizzle of extra virgin olive oil. Its a long-term staple in Italian cuisine, but can also work well as a sidedish for almost anything!
Here at Yumoid we also love a good focaccia as lunch - try cut it up and fill it up with your favourite cold cuts such as ham & cheese!
Ingredients Required
Warm water: 1 1/2 cups
Active dry yeast: 2 teaspoons
Sugar: 1 teaspoon
All-purpose flour: 4 cups
Olive oil: 1/4 cup, plus more for drizzling
Salt: 2 teaspoons
Coarse sea salt for topping
Fresh rosemary leaves (optional)
Recommended Kitchen Gear
Large mixing bowl
Wooden spoon or dough whisk
Measuring cups and spoons
Kitchen towel or plastic wrap
Baking sheet or large baking pan
Parchment paper (optional, for easier cleanup)
Directions (How-to Make It)
Prepare the Yeast Mixture: In a large mixing bowl, dissolve the sugar in warm water. Sprinkle the yeast over the water and let it sit until foamy, about 5 to 10 minutes.
Make the Dough: Add 1 cup of flour, 1/4 cup of olive oil, and 2 teaspoons of salt to the yeast mixture. Stir with a wooden spoon until combined. Gradually add the remaining flour, stirring until a sticky dough forms.
First Rise: Transfer the dough to a lightly floured surface and knead gently for a few minutes until smooth. Place the dough in a lightly oiled bowl, turning it to coat all sides with oil. Cover with a damp kitchen towel or plastic wrap and let rise in a warm place until doubled in size, about 1 to 1.5 hours.
Shape and Second Rise: Lightly oil a baking sheet or pan and press the dough out to about 1/2-inch thickness. Cover and let rise again for about 30 minutes, until slightly puffed.
Preheat Oven: Preheat your oven to 425°F (220°C).
Add Toppings: Use your fingertips to create dimples across the top of the dough. Drizzle with olive oil, sprinkle with coarse sea salt, and scatter rosemary leaves over the top if using.
Bake: Bake in the preheated oven for 20-25 minutes, or until golden brown and puffed.
Serve: Let the focaccia cool slightly before cutting into squares or strips. Serve warm or at room temperature.
This focaccia recipe offers a basic template that can be customized with your favorite toppings or infused oils. Enjoy the process of making this Italian classic, and delight in the aroma and flavor of fresh-baked bread straight from your oven.
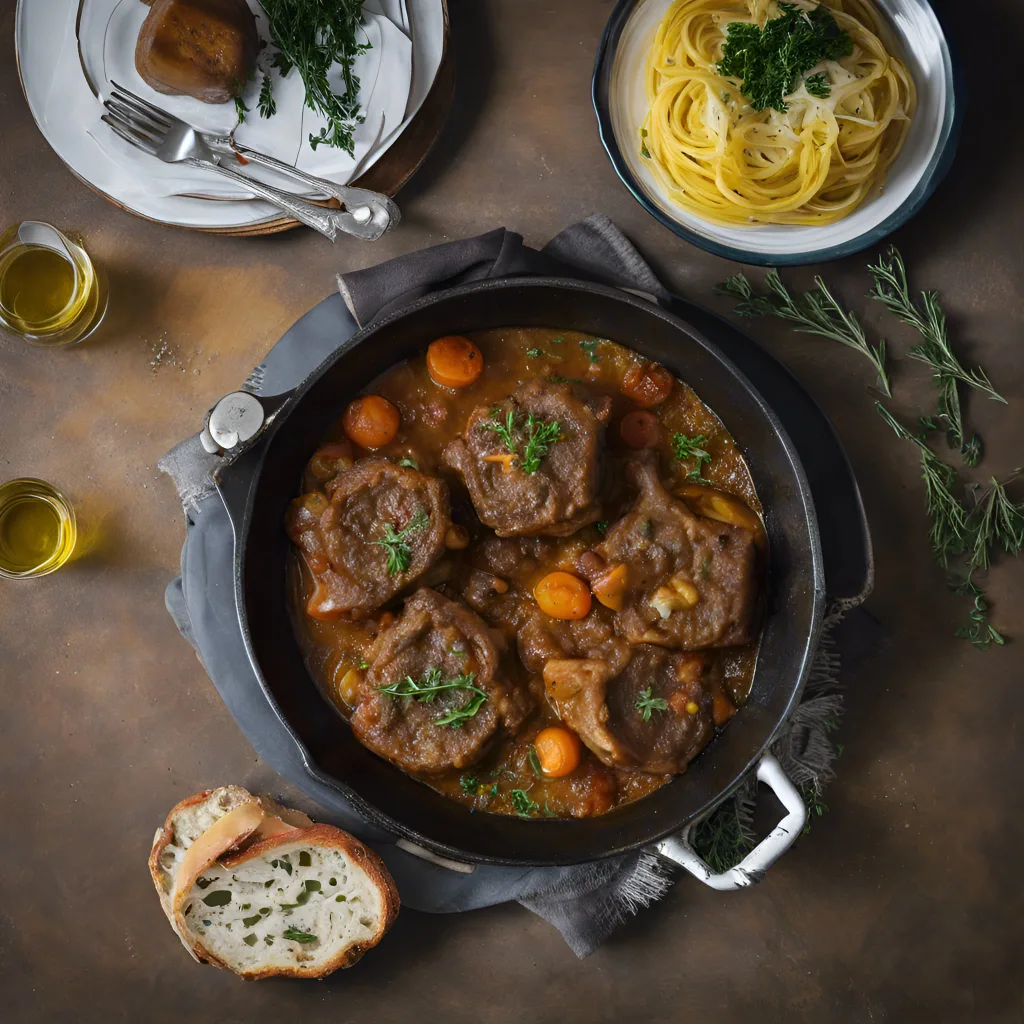
Osso Buco alla Milanese is a luxurious, hearty dish originating from Milan, in the Lombardy region of Italy. This traditional italian cuisine recipe features cross-cut veal shanks, braised slowly with onions, carrots, celery, and tomatoes, infused with white wine and broth until tender. The marrow in the bone melts into the sauce, enriching it with deep flavour and silky texture. Osso Buco is often garnished with gremolata, a zesty mix of lemon zest, garlic, and parsley, which adds a fresh, aromatic lift to the rich meat. This dish is typically served with Risotto alla Milanese, making a perfect pairing for a special occasion, a festive gathering, or an indulgent Sunday dinner.
Explore this or one of our many other dinner recipes for a tasteful meal!
Ingredients Required
Veal shanks: 4 large pieces, about 1 1/2 inches thick
All-purpose flour: for dredging
Butter: 2 tablespoons
Olive oil: 2 tablespoons
Onion: 1 large, finely chopped
Carrot: 1 large, finely chopped
Celery stalk: 1, finely chopped
Garlic cloves: 2, minced
Dry white wine: 1 cup
Canned tomatoes: 14 oz, crushed
Chicken or veal broth: 2 cups
Bay leaves: 2
Lemon zest: from 1 lemon
Fresh parsley: 1/4 cup, chopped
Garlic clove: 1, minced (for gremolata)
Salt and pepper: to taste
Recommended Kitchen Gear
Large, heavy-bottomed skillet or Dutch oven
Tongs
Cutting board and knife
Measuring cups and spoons
Mixing bowl (for gremolata)
Grater or microplane (for lemon zest)
Directions (How-to Make It)
Prepare the Veal Shanks: Season the veal shanks with salt and pepper, then dredge them lightly in flour, shaking off any excess.
Brown the Veal: In a large skillet or Dutch oven, heat the butter and olive oil over medium-high heat. Add the veal shanks and brown them on all sides, about 3-4 minutes per side. Remove the shanks and set aside.
Sauté the Vegetables: In the same pan, add the onion, carrot, and celery. Sauté until the vegetables are softened, about 5 minutes. Add the minced garlic and cook for another minute until fragrant.
Deglaze and Simmer: Pour in the white wine to deglaze the pan, scraping up any browned bits from the bottom. Add the crushed tomatoes, broth, and bay leaves. Return the veal shanks to the pan, ensuring they are submerged. Bring to a simmer, then reduce the heat to low, cover, and cook for about 1 1/2 to 2 hours, or until the meat is very tender.
Make the Gremolata: While the osso buco is cooking, prepare the gremolata by mixing together the chopped parsley, lemon zest, and minced garlic in a small bowl.
Serve: Once the meat is tender, remove the bay leaves and adjust the seasoning with salt and pepper if needed. Serve the osso buco on warm plates, sprinkled with the gremolata on top.
Osso Buco alla Milanese is a celebration of Italian cooking, showcasing the depth of flavor that can be achieved with simple, quality ingredients and patient, slow cooking. Enjoy this dish with a side of creamy Risotto alla Milanese or a simple polenta to soak up the rich sauce for a truly memorable meal.
Italian pizza sauce is a key component of any great pizza, adding depth, flavor, and moisture to the dish. This sauce is characterized by its simplicity and the use of fresh, high-quality ingredients. Made from ripe tomatoes, aromatic herbs, and a touch of seasoning, it strikes the perfect balance between acidity and sweetness, enhancing the overall taste of the pizza without overpowering the toppings. This sauce can be prepared quickly and is ideal for a variety of pizzas, from a classic Margherita to more elaborate creations. Whether you're hosting a pizza night or just making a meal for yourself, having a batch of homemade Italian pizza sauce ready can make the process more authentic and enjoyable. The required kitchen equipment is minimal and easily found in most kitchens.
If you need a Pizza Dough for your home made pizza - we have a pizza dough recipe too!
Ingredients Required
Ripe tomatoes: 800g (28 oz), fresh or canned
Olive oil: 2 tablespoons
Garlic: 2 cloves, minced
Fresh basil: A handful, chopped
Oregano: 1 teaspoon, dried
Salt: To taste
Sugar: A pinch (optional, to balance acidity)
Red pepper flakes: A pinch (optional, for heat)
Recommended Kitchen Gear
Blender or food processor (for a smoother sauce)
Knife and cutting board (for preparing ingredients)
Large saucepan
Wooden spoon or spatula
Measuring spoons
Directions (How-to Make It)
Prepare the Tomatoes: If using fresh tomatoes, blanch them in boiling water for a minute, then transfer to ice water. Peel off the skins, remove the seeds, and roughly chop. If using canned tomatoes, simply drain and crush them.
Sauté Garlic: Heat the olive oil in a large saucepan over medium heat. Add the minced garlic and sauté for a minute or until fragrant. Be careful not to let it brown.
Cook the Tomatoes: Add the prepared tomatoes to the saucepan along with the chopped basil, oregano, salt, sugar (if using), and red pepper flakes (if using). Stir to combine.
Simmer: Reduce the heat to low and let the sauce simmer for about 20-30 minutes, or until it thickens to your desired consistency. Stir occasionally to prevent sticking.
Blend (Optional): For a smoother sauce, allow the mixture to cool slightly, then transfer it to a blender or food processor and blend until smooth. This step is optional and based on your texture preference.
Adjust Seasoning: Taste the sauce and adjust the seasoning with salt, sugar, or herbs according to your preference.
Use or Store: Use the sauce immediately on your pizza dough, or let it cool and store it in an airtight container in the refrigerator for up to a week. The sauce can also be frozen for longer storage.
This Italian pizza sauce is a versatile recipe that can be easily adjusted to suit your taste preferences. Experiment with different herbs, spices, or even adding a splash of wine for depth. Enjoy spreading it on your homemade pizza dough for a truly authentic Italian pizza experience!
Pizza dough is the foundation of any great pizza, offering a canvas for an array of toppings, from the simplest margherita to the most loaded combination pizza. This versatile dough can be made thin and crispy or thick and fluffy, depending on your preference. Mastering homemade pizza dough not only elevates your pizza-making game but also allows you to customise your pizza to your exact liking. Making pizza dough from scratch is a rewarding process that's perfect for a fun family activity, a romantic dinner, or a DIY pizza party with friends. The equipment needed is minimal, making it an accessible endeavor for both novice and experienced cooks alike.
Ingredients Required
All-purpose flour: 4 cups
Warm water: 1 1/4 cups
Instant yeast: 1 packet or 2 1/4 teaspoons
Salt: 2 teaspoons
Sugar: 1 teaspoon
Olive oil: 2 tablespoons, plus extra for coating
Recommended Kitchen Gear
Large mixing bowl
Measuring cups and spoons
Wooden spoon or dough whisk
Kitchen scale (optional, for precise measurement)
Plastic wrap or a clean kitchen towel
Rolling pin (if you prefer a thinner crust)
Stand mixer with a dough hook attachment (optional, for ease of kneading)
Directions (How-to Make It)
Mix Dry Ingredients: In a large mixing bowl, combine the flour, yeast, salt, and sugar (if using). Mix these dry ingredients well to ensure the yeast is evenly distributed.
Add Water and Oil: Make a well in the center of the dry ingredients and pour in the warm water and olive oil. Using a wooden spoon or your hands, mix until a shaggy dough forms.
Knead the Dough: Transfer the dough to a lightly floured surface and knead for about 10 minutes, or until the dough is smooth and elastic. If using a stand mixer, knead with the dough hook on a low setting for about 5-7 minutes.
First Rise: Shape the dough into a ball and place it in a lightly oiled bowl. Cover the bowl with plastic wrap or a damp kitchen towel and let the dough rise in a warm place until it doubles in size, about 1 to 2 hours.
Shape and Second Rise: Once the dough has doubled, punch it down gently to release any air bubbles. Divide the dough into balls (for individual pizzas) or keep it whole for a larger pizza. Cover and let them rest for another 30 minutes to an hour, which makes shaping easier.
Preheat Oven: If baking immediately, preheat your oven to the highest temperature, ideally between 475°F (245°C) to 500°F (260°C), with a pizza stone or baking sheet inside.
Shape the Pizza: On a lightly floured surface, roll out the dough to your desired thickness. Transfer it to a piece of parchment paper for easy handling.
Add Toppings: Spread your sauce and add your desired toppings. Remember not to overload the pizza to ensure even cooking.
Bake: Transfer the pizza (with the parchment paper) to the preheated pizza stone or baking sheet. Bake for about 10-15 minutes, or until the crust is golden brown and the cheese is bubbly.
Serve: Let the pizza cool for a few minutes before slicing and serving.
Spaghetti Carbonara recipe is a classic Italian pasta dish that hails from Rome. It's beloved worldwide for its creamy texture and flavourful combination of ingredients. Traditionally made with eggs, hard cheese, cured pork, and black pepper, Carbonara is a testament to the magic of simple, high-quality ingredients coming together to create something truly special. This dish is perfect for a cozy dinner at home, impressing guests, or even a luxurious weeknight treat. Its preparation doesn't require fancy kitchen gadgets, making it accessible for cooks of all levels. To whip up this authentic Italian cuisine, you'll need a few basic pieces of kitchen equipment.
Ingredients Required
Spaghetti: 400g (14 oz)
Eggs: 4 large (use just the yolks for a richer sauce)
Pecorino Romano or Parmigiano Reggiano cheese: 1 cup, finely grated
Guanciale (or pancetta if guanciale is unavailable): 150g (5 oz), cut into small pieces
Freshly ground black pepper
Salt, to taste
Recommended Kitchen Gear
Large pot for boiling pasta
Large skillet or frying pan for cooking the guanciale or pancetta
Mixing bowl for combining eggs and cheese
Whisk or fork for beating the egg yolks
Cheese grater
Colander for draining pasta
Wooden spoon or spatula
Directions (How-to Make It)
Prepare the Ingredients: Start by grating the cheese and cutting the guanciale (or pancetta) into small pieces. Separate the egg yolks and beat them lightly, then mix in the grated cheese, adding plenty of freshly ground black pepper.
Cook the Pasta: Fill a large pot with water, add a generous amount of salt, and bring to a boil. Cook the spaghetti according to the package instructions until al dente. Reserve about a cup of the pasta cooking water before draining.
Cook the Guanciale: While the pasta cooks, heat a large skillet or frying pan over medium heat. Add the guanciale (or pancetta) pieces and cook until they are crispy and golden brown, releasing their fat. Remove from the heat once done.
Combine Pasta and Guanciale: Drain the cooked spaghetti and add it to the skillet with the guanciale. Toss well to coat the pasta in the fat.
Add the Egg Mixture: Remove the skillet from the heat to prevent the eggs from scrambling. Quickly add the egg and cheese mixture to the pasta, tossing vigorously to combine everything without cooking the egg. The heat from the pasta and pan will gently cook the eggs, creating a creamy sauce. If the sauce seems too thick, add a little of the reserved pasta water until you reach your desired consistency.
Serve Immediately: Serve the spaghetti carbonara immediately, topped with additional grated cheese and freshly ground black pepper to taste
Embrace the sweet and smoky flavors of summer with this BBQ Chicken Salad, a refreshing dish that combines the best of both worlds: the hearty, comforting taste of barbecue and the crisp, fresh elements of a salad. It's the perfect meal for those warm days when you crave something filling yet light, or for any time you want to bring a little sunshine to your table. Ideal for a quick lunch, a satisfying dinner, or as a standout side at your next cookout, this salad is as versatile as it is delicious. With minimal kitchen equipment and easy-to-find ingredients, you'll have this crowd-pleaser ready in no time.
1/2 cup corn kernels (can use fresh, canned, or thawed from frozen)
1 avocado, diced
1/4 cup red onion, thinly sliced
1/2 cup shredded cheese (cheddar or a blend works well)
1/4 cup cilantro, chopped (optional)
Tortilla strips or croutons for crunch
Ranch dressing or your favorite salad dressing
Directions (How-to Make It)
Prepare the BBQ Chicken: If not using pre-cooked chicken, grill or cook your chicken in a skillet until fully cooked, then shred or chop it. Toss the chicken in a bowl with the BBQ sauce until evenly coated. Set aside to let the flavors meld.
Assemble the Salad: In a large mixing bowl, combine the mixed salad greens, cherry tomatoes, black beans, corn, avocado, and red onion. Gently toss to distribute the ingredients evenly.
Add the Chicken: Add the BBQ chicken to the salad and toss lightly to combine. The BBQ sauce from the chicken will start to mix with the rest of the salad, adding its unique flavor.
Serve: Divide the salad among plates or bowls. Sprinkle shredded cheese and cilantro over each serving. Add a crunch with tortilla strips or croutons. Drizzle a little more BBQ sauce and your choice of salad dressing over the top.
Enjoy: Dig in and enjoy the mix of smoky, tangy, and fresh flavors that make this BBQ Chicken Salad a delightful meal.
BBQ Chicken Salad is a fantastic way to enjoy the flavors of a barbecue in a lighter, more nutritious form. It's easy to make, especially if you have leftover chicken, and the combination of ingredients can be adjusted to suit your taste or what you have on hand. Whether you're serving it up as a main dish or a side salad, it's sure to be a hit with its irresistible blend of flavors and textures. Enjoy the taste of summer any time of the year with this delicious salad!
Indulge in the spicy, tangy flavours of a Buffalo Chicken Wrap, a perfect blend of comfort food and convenience wrapped up in a delicious, easy-to-eat package. This recipe is for anyone who loves the bold taste of buffalo chicken but wants a lighter, more portable option. Ideal for a quick lunch, game day snack, or a simple dinner that doesn't skimp on flavour, the Buffalo Chicken Wrap brings all the heat and zest of your favourite buffalo wings, minus the mess! With a few basic kitchen tools and some simple ingredients, you'll whip up this tasty wrap in no time, making it a surefire hit for anyone craving that buffalo chicken goodness.
Explore other lunch recipes from our Yumoid.com kitchen!
Equipment Required
Skillet or frying pan
Knife and cutting board
Mixing bowl
Microwave or stove for warming tortillas (optional)
Ingredients Required
2 cups cooked chicken, shredded (a great use for leftovers!)
1/2 cup buffalo sauce, store-bought or homemade
4 large flour tortillas
1/4 cup ranch or blue cheese dressing
1 cup lettuce, shredded
1/2 cup carrots, julienned or shredded
1/2 cup celery, thinly sliced
1/4 cup blue cheese crumbles (optional)
Salt and pepper to taste
Directions (How-to Make It)
Prepare the Buffalo Chicken: In a skillet over medium heat, warm the shredded chicken. Pour the buffalo sauce over the chicken, stirring until the chicken is thoroughly coated and the mixture is hot. Adjust the amount of buffalo sauce to your taste for more or less heat.
Warm the Tortillas: Heat the tortillas in the microwave for about 10-15 seconds or on a skillet for a few seconds on each side. This makes them more pliable and easier to wrap.
Assemble the Wraps: Lay a warmed tortilla flat on a clean surface. Spread a tablespoon of ranch or blue cheese dressing down the center of the tortilla. Add a generous helping of the buffalo chicken on top of the dressing.
Add the Veggies: Top the chicken with shredded lettuce, carrots, and celery. If using, sprinkle blue cheese crumbles over the vegetables. The crisp veggies will add a fresh crunch and help balance the heat of the buffalo sauce.
Wrap It Up: Fold in the sides of the tortilla, then roll it up tightly from the bottom, enclosing the filling. Repeat the process for the remaining tortillas.
Serve and Enjoy: Cut the wraps in half, if desired, and serve immediately. Enjoy the spicy, creamy, crunchy combination that makes these Buffalo Chicken Wraps irresistibly delicious.
Buffalo Chicken Wraps are a fantastic way to enjoy all the flavors of buffalo chicken in a less messy, more mobile form. They're perfect for lunches on the go, picnics, or any time you need a quick and satisfying meal. Plus, with the option to customize the level of spice, dressing, and veggies, you can make each wrap your own. Dive into the spicy delight of these wraps and let your taste buds soar!
Get ready to bring the bold flavours of Chipotle right into your kitchen with this Homemade Chipotle Burrito Bowl! This recipe is perfect for anyone who loves the rich, layered tastes of a Chipotle bowl but wants the satisfaction of making it at home. Whether you're aiming for a quick and hearty lunch, a customizable dinner option for the family, or simply a delicious way to satisfy your Chipotle cravings without leaving the house, this recipe has got you covered. Here at Yumoid.com we're all about using what we got in the fridge - and the Copycat Chipotle Burrito Bowl is perfect for getting rid of those leftovers!
Make a tasteful lunch or explore our other lunch recipes!
Equipment Required
Large skillet or grill pan for cooking protein
Saucepan for rice and beans
Knife and cutting board for chopping vegetables
Mixing bowls for salsas and guacamole
Ingredients Required
1 cup white rice, cooked according to package instructions
2 limes, juiced, plus more for garnish
1/4 cup fresh cilantro, chopped
Salt to taste
1 pound chicken breast (or your choice of protein: beef, pork, tofu)
2 tablespoons olive oil
1 tablespoon Chipotle seasoning (or a mix of smoked paprika, cumin, garlic powder, onion powder, and chili powder)
1 can black beans, drained and rinsed
1 cup corn kernels (fresh, canned, or thawed if frozen)
1 cup pico de gallo or fresh salsa
1 avocado, mashed for guacamole (mix with lime juice and salt)
Shredded cheese (optional)
Sour cream (optional)
Shredded lettuce
Chopped vegetables (bell peppers, onions) for sautéing (optional)
Directions (How-to Make It)
Prepare the Cilantro Lime Rice: Cook the white rice according to package instructions. Once cooked, fluff with a fork and mix in the juice of 1 lime, chopped cilantro, and salt to taste. Set aside.
Cook Your Protein: Season your choice of protein with Chipotle seasoning or the spice mix. In a large skillet or grill pan, heat the olive oil over medium-high heat. Cook the protein until it's thoroughly cooked and slightly charred on the outside. Let it rest before slicing into bite-sized pieces.
Warm the Beans and Corn: In a saucepan, gently heat the black beans and corn kernels until warm. Season with a little salt and lime juice if desired.
Assemble the Burrito Bowls: Start with a base of cilantro lime rice. Add a layer of black beans and corn. Arrange the cooked protein on top. Add fresh salsa or pico de gallo and a dollop of mashed avocado or guacamole.
Add Toppings: Sprinkle with shredded cheese, a spoonful of sour cream, and shredded lettuce as desired. If using, add sautéed vegetables for extra flavor and texture.
Serve and Enjoy: Finish your bowl with a squeeze of lime juice and a sprinkle of fresh cilantro. Mix everything together and enjoy the explosion of flavors that make Chipotle bowls so irresistible.
Creating your own Copycat Chipotle Burrito Bowl at home allows for endless customization to cater to any taste or dietary preference. Whether you stick closely to the classic Chipotle lineup or get creative with your ingredients, the result is sure to be delicious. Enjoy the process of building your perfect burrito bowl and the even better experience of digging in!
Dive into the creamy, savory world of Chicken Caesar Pasta Salad, where classic Caesar charm meets the hearty comfort of pasta. This dish is a delightful fusion that’s bound to become a lunchtime favorite, offering a satisfying meal that's both nutritious and packed with flavor. It's perfect for those days when you crave something more substantial than a salad but still want to keep things light and refreshing. Ideal for meal prep, picnics, or a lovely side dish at your next barbecue, this salad is versatile and can be customized to your liking. Plus, with minimal kitchen equipment required, it's as easy to make as it is delicious to eat!
Equipment Required
Large pot for boiling pasta
Colander for draining pasta
Large mixing bowl
Knife and cutting board
Measuring cups and spoons
Ingredients Required
8 ounces of pasta (rotini, fusilli, or penne work well)
2 cups cooked chicken, shredded or chopped (great for leftovers!)
1 cup cherry tomatoes, halved
1/2 cup Parmesan cheese, grated
2 cups romaine lettuce, chopped
3/4 cup Caesar dressing, store-bought or homemade
Salt and pepper to taste
Croutons for garnish (optional)
Lemon wedges for serving (optional)
Directions (How-to Make It)
Cook the Pasta: Bring a large pot of salted water to a boil. Add the pasta and cook according to package instructions until al dente. Drain the pasta in a colander, rinse under cold water to stop the cooking process, and set aside to cool.
Mix the Salad: In a large mixing bowl, combine the cooled pasta, cooked chicken, cherry tomatoes, and chopped romaine lettuce. Gently toss to mix.
Dress It Up: Pour the Caesar dressing over the salad mixture. Add the grated Parmesan cheese and a pinch of salt and pepper to taste. Toss everything together until the salad is well coated with the dressing.
Garnish and Serve: Sprinkle croutons over the top for added crunch if desired. Give the salad a final gentle toss and serve with lemon wedges on the side for an extra zing.
Chicken Caesar Pasta Salad is a fantastic way to enjoy the flavors of a classic Caesar salad with the added heartiness of pasta and chicken. It’s a complete meal that’s both fulfilling and refreshingly easy to prepare. Whether you're making it for a quick lunch, a meal prep solution, or as a crowd-pleasing side, it’s sure to satisfy any appetite. Enjoy the delicious blend of flavors and textures in this modern twist on a beloved classic!
Welcome to the whimsical world of Pinwheel Sandwiches recipes, a delightful twist on the classic sandwich that's as fun to make as it is to eat! Perfect for picnics, parties, or jazzing up your lunchbox, these spiraled beauties are a hit with both kids and adults alike. Pinwheel sandwiches combine simplicity and creativity, allowing you to roll your favorite ingredients into a tight, eye-catching spiral.
They're ideal for those days when you're craving something light yet satisfying, or when you're tasked with bringing a crowd-pleaser to a gathering. Plus, they're customizable to suit any dietary preference or fridge leftovers. All you need is a flat surface, some plastic wrap, and your imagination to get rolling!
Want to spice it up? Explore more lunch recipes with Yumoid today!
Recommended Kitchen Gear
Cutting board
Sharp knife
Plastic wrap
Rolling pin (optional, for flattening bread)
Ingredients Required
Large tortillas or flatbreads
Your choice of spread (cream cheese, hummus, pesto, etc.)
Sliced deli meats or a vegetarian alternative
Sliced cheese
Fresh vegetables (lettuce, spinach, bell peppers, cucumbers, etc.)
Optional: herbs, seasonings, or additional toppings
Directions (How-to Make It)
Prepare the Base: Lay a tortilla or flatbread on a cutting board. If using regular sliced bread, use a rolling pin to flatten it slightly.
Spread It Out: Evenly spread your chosen base (cream cheese, hummus, etc.) over the tortilla. This not only adds flavor but also acts as a glue to hold the pinwheel together.
Layer It Up: Add a layer of sliced deli meats or a vegetarian alternative on top of the spread. Then, add a layer of sliced cheese.
Add Some Crunch: Place a row of fresh vegetables near the edge of the tortilla closest to you. If you like, sprinkle your favorite herbs or seasonings over the top for extra flavor.
Roll It Tight: Carefully start rolling the tortilla away from you, keeping it as tight as possible. The first roll is crucial to get a tight spiral. Continue rolling until you reach the end of the tortilla.
Wrap and Chill: Wrap the rolled tortilla in plastic wrap and refrigerate for at least 30 minutes. This helps the pinwheel hold its shape and makes it easier to cut.
Slice and Serve: Remove the plastic wrap and use a sharp knife to slice the roll into 1-inch thick pieces. Serve immediately or store in an airtight container for later enjoyment.
Pinwheel sandwiches are a playful and versatile option for any lunch occasion. Feel free to experiment with different fillings and spreads to find your perfect combination. Enjoy the roll of flavor with every bite!