Dive into the heart of Italian cuisine with Creamy Tuscan Chicken, a dish that marries the robust flavors of the Tuscan region with the comfort of creamy sauce and tender chicken. This recipe is a celebration of simple ingredients coming together to create a meal that's both hearty and elegant. Perfect for a cozy dinner at home, impressing guests, or just treating yourself to a delicious and satisfying meal, Creamy Tuscan Chicken is sure to become a favorite. With minimal prep and a handful of kitchen staples, you'll be able to whip up this restaurant-quality dish in no time, filling your kitchen with the irresistible aroma of garlic, herbs, and sun-dried tomatoes.
Equipment Required
Large skillet or frying pan
Knife and cutting board
Measuring cups and spoons
Wooden spoon or spatula for stirring
Ingredients Required
4 boneless, skinless chicken breasts
Salt and pepper to taste
2 tablespoons olive oil
3 cloves garlic, minced
1 cup heavy cream
1/2 cup chicken broth
1 teaspoon Italian seasoning
1/2 cup sun-dried tomatoes, chopped
1/2 cup grated Parmesan cheese
2 cups fresh spinach
Optional: Fresh basil for garnish
Directions (How-to Make It)
Prepare the Chicken: Season both sides of the chicken breasts with salt and pepper. In a large skillet, heat the olive oil over medium-high heat. Add the chicken breasts and cook until golden brown on both sides and cooked through, about 6-8 minutes per side. Remove the chicken from the skillet and set aside.
Make the Sauce: In the same skillet, add the minced garlic and sauté for about 1 minute until fragrant. Pour in the heavy cream, chicken broth, and Italian seasoning. Stir to combine and bring the mixture to a simmer.
Add the Sun-Dried Tomatoes and Parmesan: Stir in the sun-dried tomatoes and grated Parmesan cheese. Let the sauce simmer for a few minutes until it begins to thicken slightly.
Incorporate the Spinach: Add the fresh spinach to the skillet and cook until the spinach has wilted, about 2-3 minutes.
Return the Chicken to the Skillet: Place the cooked chicken breasts back into the skillet, spooning the sauce over them to coat. Cook for another 2-3 minutes to ensure the chicken is heated through and infused with the sauce flavors.
Serve: Transfer the chicken breasts to plates and spoon the creamy Tuscan sauce over the top. Garnish with fresh basil if desired.
Creamy Tuscan Chicken is a dish that truly showcases the power of simple, flavourful ingredients combined in the right way. The creamy sauce, enriched with the tang of sun-dried tomatoes and the earthiness of spinach, perfectly complements the juicy chicken breasts, making every bite a delight. Serve this dish over pasta, rice, or with a side of crusty bread to soak up the delicious sauce for a meal that's sure to transport you to the rolling hills of Tuscany.
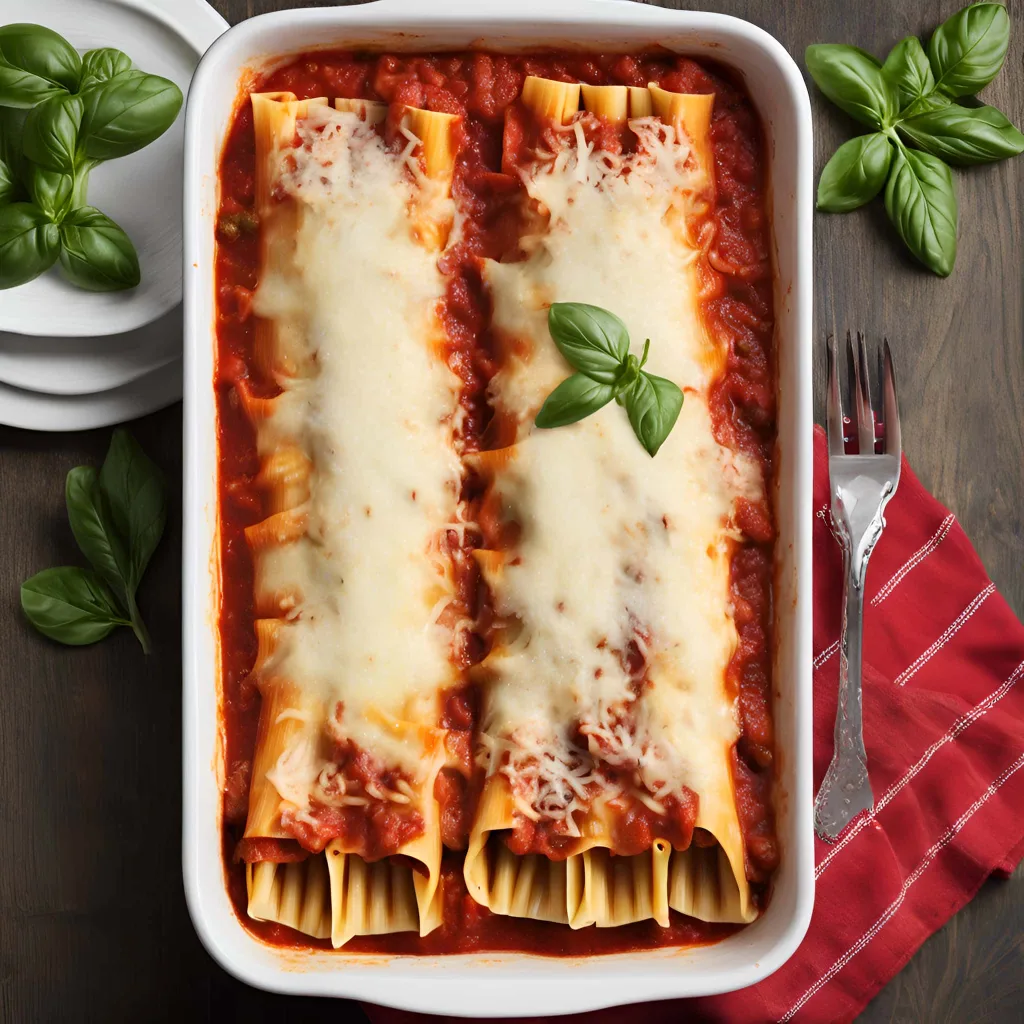
Embark on a culinary journey to Italy with this Easy Manicotti recipe, a classic dish that brings the rich, comforting flavours of Italian cuisine right to your table. Perfect for a cozy family dinner, special occasions, or whenever the craving for something cheesy and delicious strikes, this manicotti recipe is simplified for convenience without sacrificing taste. It's ideal for both novice cooks and seasoned home chefs looking for a straightforward yet satisfying meal. With its creamy filling, flavorful sauce, and melted cheese topping, this dish is sure to become a staple in your recipe collection. Plus, with basic kitchen equipment, you can prepare a meal that feels gourmet with minimal effort.
Equipment Required
Large pot for boiling manicotti shells
Mixing bowl for cheese filling
Spoon or piping bag for filling manicotti
9x13 inch baking dish
Aluminum foil (optional, for covering while baking)
Ingredients Required
1 package (8 oz) manicotti shells
15 oz ricotta cheese
2 cups shredded mozzarella cheese, divided
1/2 cup grated Parmesan cheese, plus more for topping
1 egg
2 teaspoons dried Italian seasoning
Salt and pepper to taste
2 cups marinara sauce, store-bought or homemade
Fresh basil for garnish (optional)
Directions (How-to Make It)
Preheat Oven and Prepare Manicotti Shells: Preheat your oven to 350°F (175°C). Bring a large pot of salted water to a boil. Add the manicotti shells and cook until al dente, according to package instructions. Drain and rinse under cold water to stop the cooking process; set aside.
Mix the Filling: In a mixing bowl, combine the ricotta cheese, 1 cup of the mozzarella cheese, the Parmesan cheese, egg, Italian seasoning, salt, and pepper. Stir until well mixed. If the mixture is too thick, you can add a little milk to thin it out for easier piping.
Fill the Manicotti: Spoon the cheese mixture into a piping bag or a plastic bag with a corner cut off. Gently fill each manicotti shell with the cheese mixture, being careful not to tear the shells.
Assemble the Dish: Spread a thin layer of marinara sauce on the bottom of a 9x13 inch baking dish. Arrange the filled manicotti in a single layer over the sauce. Pour the remaining marinara sauce over the top of the manicotti, covering them completely. Sprinkle the remaining mozzarella cheese and a little extra Parmesan over the sauce.
Bake: Cover the dish with aluminum foil (to prevent cheese from burning) and bake in the preheated oven for 25 minutes. Remove the foil and bake for an additional 10-15 minutes, or until the cheese is bubbly and slightly golden.
Serve: Let the manicotti cool for a few minutes before serving. Garnish with fresh basil leaves if desired.
This Easy Manicotti recipe captures the essence of Italian comfort food with every bite. The creamy, cheesy filling wrapped in tender pasta shells, all smothered in a savory marinara sauce and baked to perfection, creates a dish that's as heartwarming as it is delicious. Serve it up for any occasion and watch as it becomes an instant favorite among family and friends. Buon appetito!
Indulge in the simple elegance of Chocolate Covered Strawberries, a luxurious treat that combines the freshness of ripe strawberries with the rich, velvety smoothness of melted chocolate. This classic dessert is perfect for romantic occasions, special celebrations, or anytime you're in the mood for a decadent yet easy-to-make treat. Not only are chocolate covered strawberries visually stunning, but they also offer a delightful contrast of flavors and textures. Whether you're making them for a special someone, as a party snack, or simply to treat yourself, this recipe is foolproof and guaranteed to impress. Plus, with just a few ingredients and minimal kitchen equipment, you can create a gourmet dessert in no time.
Ingredients Required
1 pound fresh strawberries, washed and thoroughly dried
8 ounces high-quality chocolate (dark, milk, or white), chopped
Optional toppings: Crushed nuts, sprinkles, mini chocolate chips, or drizzles of a different type of chocolate
Equipment Required
Parchment paper
Baking sheet or tray
Microwave-safe bowl or double boiler
Toothpicks or forks (for dipping)
Directions (How-to Make It)
Prep the Strawberries: Ensure the strawberries are fully dry after washing. Any moisture can cause the chocolate to seize up. Line a baking sheet with parchment paper.
Melt the Chocolate: Place the chopped chocolate in a microwave-safe bowl. Microwave in 30-second intervals, stirring after each interval, until the chocolate is completely melted and smooth. Alternatively, melt the chocolate using a double boiler over low heat, stirring constantly.
Dip the Strawberries: Hold a strawberry by the stem or use a toothpick/fork inserted into the top. Dip it into the melted chocolate, letting the excess chocolate drip off. Place the dipped strawberry on the parchment paper. Repeat with the remaining strawberries. If using, sprinkle your chosen toppings on the strawberries before the chocolate sets.
Set the Chocolate: Allow the chocolate to harden at room temperature, or for faster setting, refrigerate the strawberries for about 15-30 minutes.
Serve: Once the chocolate has set, serve the strawberries on a platter or store them in an airtight container in the refrigerator for up to 24 hours.
Chocolate Covered Strawberries are a testament to the beauty of simplicity in dessert-making. Each bite offers a harmonious blend of juicy, sweet strawberries and the creamy indulgence of chocolate, making them a favorite for any occasion. Whether dressed up with fancy toppings or enjoyed in their classic form, these treats are sure to delight and satisfy any chocolate lover's craving.
Dive into the unique, bold flavors of our Radicchio Salad recipe, a vibrant dish that combines the slightly bitter, peppery taste of radicchio with a variety of textures and complementary flavors. This salad is a celebration of simplicity and sophistication, offering a refreshing departure from the ordinary green salad. Perfect for those who love to explore different taste profiles or for anyone looking to add a splash of color and a burst of flavor to their meal. Whether served as an elegant starter, a light lunch, or a colorful side, Radicchio Salad is as versatile as it is delicious. With just a few kitchen essentials and some fresh ingredients, you can create a salad that's sure to impress.
Equipment Required
Knife and cutting board
Salad spinner or paper towels (for drying leaves)
Large mixing bowl
Small bowl for dressing
Whisk or fork for emulsifying dressing
Ingredients Required
1 head of radicchio, leaves separated, washed, and torn into bite-sized pieces
1/4 cup walnuts, toasted and roughly chopped
1/2 cup pear, thinly sliced
1/4 cup Parmesan cheese, shaved
2 tablespoons balsamic vinegar
1/4 cup extra virgin olive oil
1 teaspoon honey or maple syrup
Salt and pepper to taste
Optional: 1/4 cup dried cranberries or cherries for added sweetness
Directions (How-to Make It)
Prepare the Radicchio: After washing the radicchio leaves, dry them thoroughly using a salad spinner or pat them dry with paper towels. Tear the leaves into bite-sized pieces and place them in a large mixing bowl.
Toast the Walnuts: In a dry skillet over medium heat, toast the walnuts until they're fragrant and lightly browned, about 3-5 minutes. Keep an eye on them to prevent burning. Let them cool, then roughly chop.
Make the Dressing: In a small bowl, whisk together the balsamic vinegar, extra virgin olive oil, and honey (or maple syrup) until well combined. Season with salt and pepper to taste.
Assemble the Salad: Add the sliced pear and toasted walnuts to the radicchio in the large mixing bowl. If using, sprinkle the dried cranberries or cherries over the top. Drizzle the dressing over the salad and gently toss to ensure all the ingredients are evenly coated.
Serve: Garnish the salad with shaved Parmesan cheese. Serve immediately to enjoy the crispness of the radicchio and the blend of flavors.
Radicchio Salad offers a wonderful contrast in flavors and textures, from the bitter crunch of radicchio to the sweet, juicy pears, the nutty walnuts, and the creamy Parmesan. It's a testament to the beauty of simplicity in cooking, showcasing how a handful of ingredients can come together to create a dish that's both elegant and deeply satisfying. Whether you're looking to elevate a weeknight dinner or impress guests at a dinner party, this salad is a surefire way to delight the palate.
Who doesn't love a good Mac'n'Cheese? This timeless comfort food is a favorite for many and for good reason. It's creamy, cheesy, and utterly delicious. Plus, it's incredibly easy to make, making it perfect for a quick weeknight dinner when time is of the essence or a cozy Sunday meal to enjoy with family. Whether you're a cooking novice or a seasoned chef, this Mac'n'Cheese recipe is bound to become a staple in your kitchen. So, let's dive into the world of gooey cheese and tender pasta with a recipe that's as fun to make as it is to eat!
Ingredients for Mac'n'Cheese
8 ounces of elbow macaroni (about 2 cups)
2 tablespoons of unsalted butter
2 tablespoons of all-purpose flour
2 cups of whole milk
8 ounces of sharp cheddar cheese, grated (about 2 cups)
1/2 teaspoon of salt
1/4 teaspoon of ground black pepper
Optional toppings: breadcrumbs, extra cheese, paprika, or bacon bits
How to Make Mac'n'Cheese Step-by-Step
Cook the Pasta: Bring a large pot of salted water to a boil. Add the elbow macaroni and cook according to the package instructions until al dente. Drain the pasta and set it aside.
Make the Roux: In the same pot, melt the butter over medium heat. Sprinkle the flour over the melted butter and whisk continuously for about 1 minute to cook off the floury taste. This mixture is called a roux and will help thicken your cheese sauce.
Add the Milk: Gradually add the milk to the roux, whisking constantly to prevent any lumps from forming. Continue to cook and whisk until the mixture thickens and begins to simmer, about 5 minutes.
Add the Cheese: Lower the heat to medium-low and add the grated cheddar cheese to the pot. Stir until the cheese is completely melted and the sauce is smooth. Season with salt and pepper to taste.
Combine Pasta and Cheese Sauce: Add the drained macaroni to the cheese sauce and stir until the pasta is evenly coated. If the sauce seems too thick, you can thin it out with a little more milk, added a tablespoon at a time.
Optional Toppings: If you're feeling adventurous, sprinkle your Mac'n'Cheese with breadcrumbs, extra cheese, paprika, or bacon bits for added flavor and texture. Place under the broiler for a few minutes until the topping is golden and crispy.
Serve: Serve the Mac'n'Cheese immediately, straight from the pot, or transfer it to a serving dish. Enjoy the creamy, cheesy goodness!
This Mac'n'Cheese recipe is not only a crowd-pleaser but also a testament to the beauty of simple, comforting meals. Whether it's a hectic weekday or a leisurely weekend, this dish is sure to satisfy your cravings for something cheesy and delicious. Happy cooking!
Pizza Prosciutto e Funghi combines the delicate, savory flavors of prosciutto with the earthy depth of mushrooms, creating a harmonious blend atop a classic pizza base. This Italian staple is a testament to the elegance of simplicity, where each ingredient is allowed to shine, contributing to a sophisticated yet comforting dish. Here at Yumoid.com the Prosciutto e Funghi pizza is among our favourites, and its far easier to make than many would believe!
Mushrooms: 1 cup, thinly sliced (button or cremini work well)
Olive oil: For drizzling
Salt and freshly ground black pepper: to taste
Fresh basil leaves: A handful for garnish (optional)
What you need
Pizza stone or baking sheet
Rolling pin (if hand-stretching the dough)
Pizza cutter or knife
Oven
Baking parchment (optional, for easier transfer)
Directions (How-to Make It)
Preheat the Oven: Place a pizza stone in the oven and preheat to the highest temperature, typically between 475°F (245°C) to 500°F (260°C), for at least 30 minutes. If using a baking sheet, no need to preheat it.
Prepare the Dough: On a lightly floured surface, roll out or hand-stretch the pizza dough to your desired thickness, aiming for a 12 to 14-inch circle.
Assemble the Pizza: Spread the tomato sauce evenly over the dough, leaving a small border around the edges. Evenly distribute the mozzarella cheese over the sauce, then arrange the sliced mushrooms on top. Season with a little salt and freshly ground black pepper.
Bake the Pizza: Transfer the pizza to the preheated pizza stone or baking sheet. Bake for about 10-15 minutes, or until the crust is golden and the cheese is bubbly.
Add the Prosciutto: Once the pizza is baked, remove it from the oven and immediately top with the prosciutto slices. The residual heat will gently warm the prosciutto without cooking it, preserving its delicate flavor and texture.
Garnish and Serve: Drizzle with a little olive oil and scatter fresh basil leaves over the top, if using. Slice and serve immediately.
Pizza Prosciutto e Funghi is a delightful combination of flavors that elevates the pizza experience. It's a dish that pairs well with a light salad and a glass of Italian wine, making for a truly enjoyable meal. Enjoy the process of making it and the pleasure of sharing it with those you love.
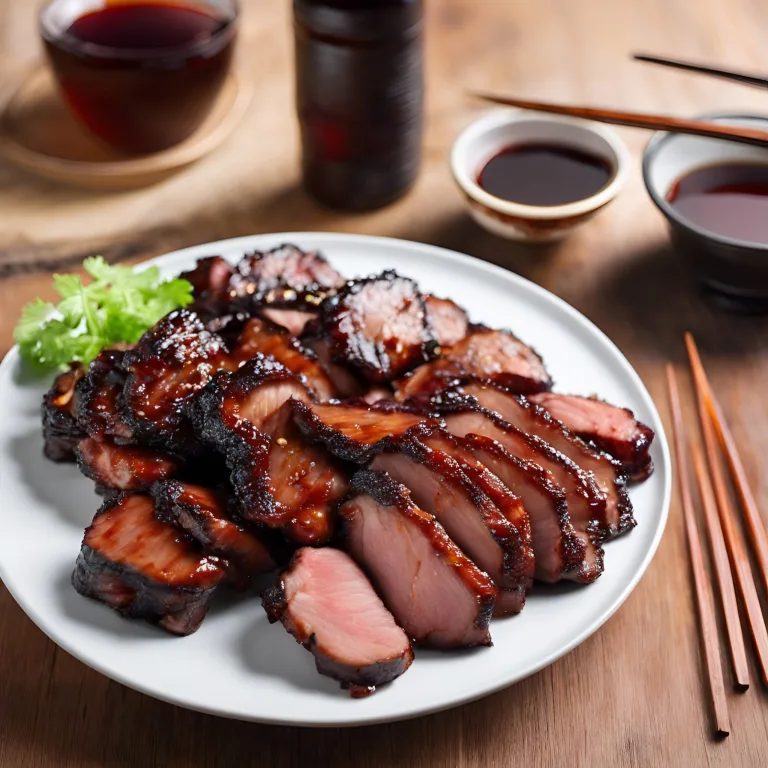
Pizza Diavola, or "Devil's Pizza," is a spicy and flavorful pizza recipe that has earned its place in the hearts of those who love a little heat with their meal. This Italian classic combines the simplicity of a Margherita pizza with the fiery kick of spicy salami, usually in the form of pepperoni or 'nduja, a particularly spicy, spreadable pork salumi from Italy.
The name "Diavola" reflects its devilishly hot flavour profile, making it a favourite among those who appreciate a bit of spice in their food. Ideal for a casual dinner, game night, or any occasion that calls for a dish with a bit of a kick, Pizza Diavola is as fun to make as it is to eat.
Preheat the Oven: If you're using a pizza stone, place it in the oven and preheat to the highest temperature, typically between 475°F (245°C) to 500°F (260°C), for at least 30 minutes. If using a baking sheet, no need to preheat it.
Prepare the Dough: On a lightly floured surface, roll out or hand-stretch the pizza dough to your desired thickness, aiming for a 12 to 14-inch circle.
Add Toppings: Spread the tomato sauce evenly over the dough, leaving a small border around the edges. Distribute the mozzarella cheese and then add the spicy salami slices. Sprinkle with red chili flakes and a pinch of salt.
Bake the Pizza: Transfer the pizza to the preheated pizza stone or baking sheet. Bake for about 10-15 minutes, or until the crust is golden and the cheese is bubbly and starting to brown.
Garnish and Serve: Remove the pizza from the oven, let it cool for a few minutes, then drizzle with a little olive oil and scatter fresh basil leaves over the top. Slice and serve immediately.
Pizza Diavola combines the best of Italian flavors with the excitement of spice, making it a perfect dish for those looking to add a little heat to their pizza night. Enjoy crafting this spicy delight and share the warmth with friends and family!
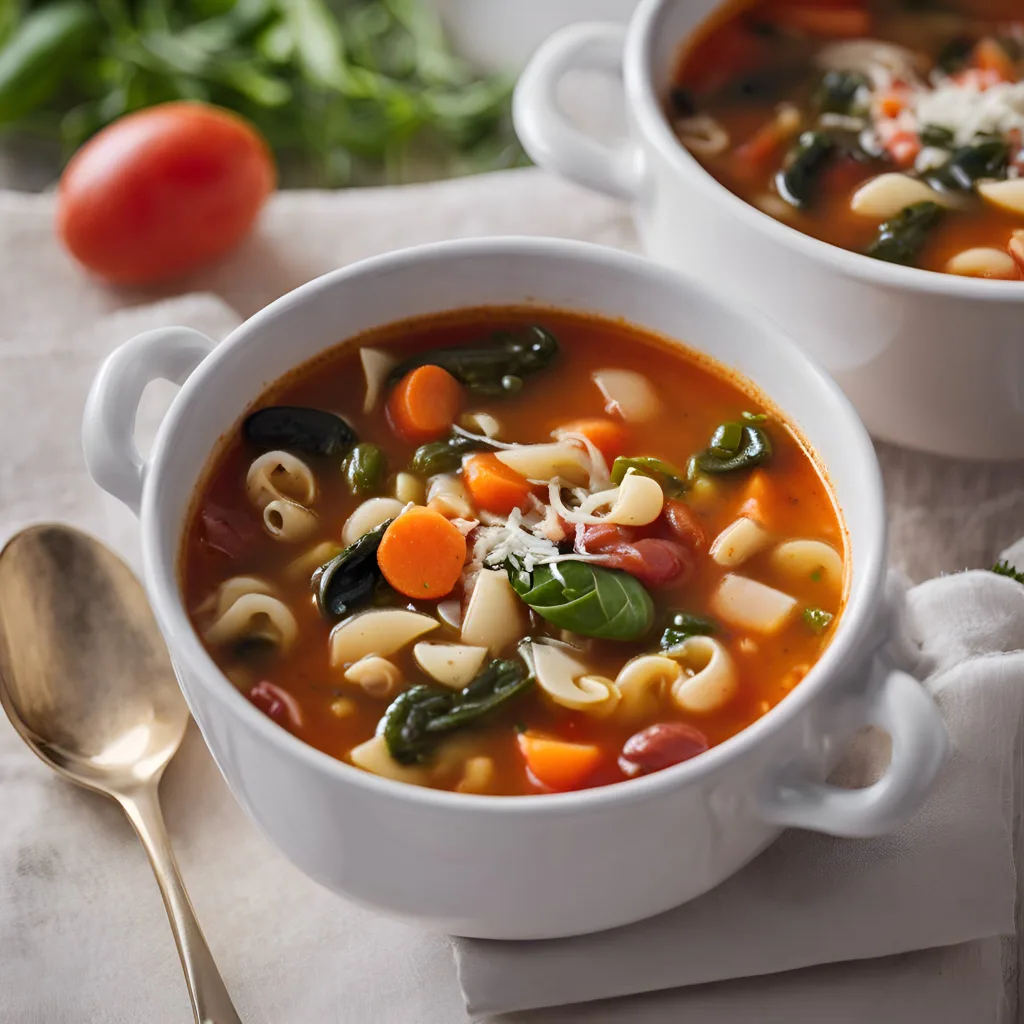
Minestrone is a hearty, nourishing Italian soup that embodies the essence of rustic, comfort food. Originating from Italy, this soup varies from region to region, featuring a rich blend of vegetables, beans, and pasta or rice, simmered in a flavorful tomato-based broth. Minestrone is a versatile dish that encourages improvisation, allowing cooks to use whatever vegetables are in season or on hand. It's a perfect way to make a warm, filling meal out of simple ingredients. Traditionally served with a sprinkle of Parmesan cheese on top, this soup is both a satisfying main course and an excellent starter. Making minestrone is straightforward, requiring basic kitchen tools and a bit of chopping.
Ingredients Required
Olive oil: 2 tablespoons
Onion: 1, chopped
Carrots: 2, diced
Celery stalks: 2, diced
Garlic cloves: 2, minced
Zucchini: 1, diced
Green beans: 1 cup, cut into 1-inch pieces
Canned tomatoes: 14 oz, diced
Vegetable or chicken broth: 6 cups
Canned kidney beans: 15 oz, drained and rinsed
Canned cannellini beans: 15 oz, drained and rinsed
Small pasta (e.g., ditalini or elbow macaroni): 1 cup
Spinach or Swiss chard: 2 cups, roughly chopped
Salt and pepper: to taste
Parmesan cheese: grated, for serving
Recommended Kitchen Gear
Large pot or Dutch oven
Knife and cutting board
Measuring cups and spoons
Wooden spoon
Ladle (for serving)
Directions (How-to Make It)
Sauté the Base Vegetables: In a large pot, heat the olive oil over medium heat. Add the onion, carrots, and celery, cooking until the vegetables start to soften, about 5 minutes. Add the minced garlic and cook for another minute until fragrant.
Add Remaining Vegetables: Stir in the zucchini and green beans, cooking for a few more minutes. Then add the diced tomatoes with their juice.
Simmer the Soup: Pour in the broth and bring the mixture to a boil. Reduce the heat to low and let simmer for about 20 minutes, or until the vegetables are tender.
Add Beans and Pasta: Add the kidney beans, cannellini beans, and pasta to the pot. Continue to simmer until the pasta is cooked, about 10 minutes. If the soup is too thick, add more broth or water to reach your desired consistency.
Finish with Greens: A few minutes before the soup is done, stir in the spinach or Swiss chard, allowing it to wilt but retain its color.
Season and Serve: Taste the soup and adjust the seasoning with salt and pepper. Serve hot, garnished with grated Parmesan cheese.
Minestrone is a celebration of seasonal vegetables and Italian culinary simplicity. It's a flexible recipe that can be adapted to whatever you have in your pantry or fridge, making it an ideal choice for a nutritious and comforting meal any day of the week.
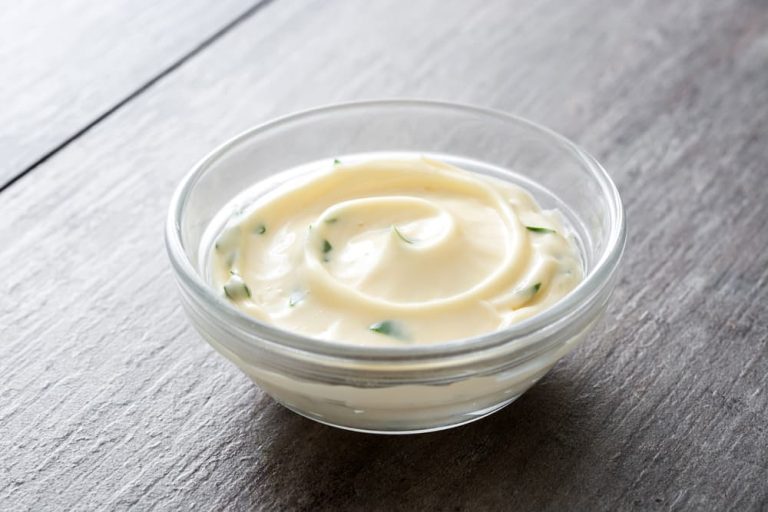
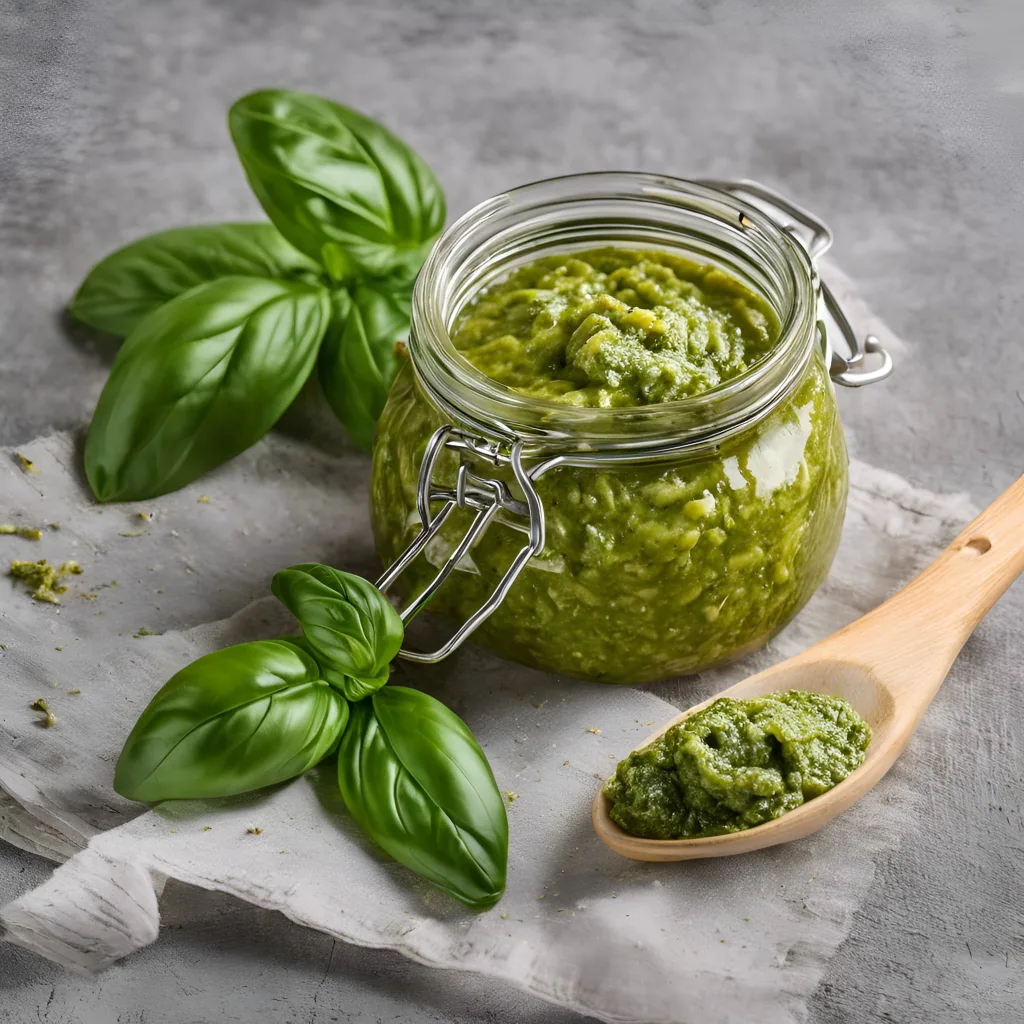
Pesto Genovese is a vibrant, aromatic sauce originating from Genoa in the Liguria region of Italy. This iconic sauce is made from fresh basil, garlic, pine nuts, Parmesan (or Pecorino) cheese, olive oil, and a pinch of salt, blended together to create a rich, green sauce that's both versatile and delicious. Traditionally served with pasta, Pesto Genovese can also be used as a spread for bruschetta, a dressing for salads, or a marinade for meats. Its fresh flavors are a hallmark of Italian summer cuisine, but it can be enjoyed year-round thanks to the availability of fresh basil. Making your own pesto at home is quick and easy, requiring only a few simple kitchen tools, and it allows you to adjust the ingredients to your taste for a personalized touch.
Ingredients Required
Fresh basil leaves: 2 cups, packed
Garlic: 2 cloves
Pine nuts: 1/3 cup (can substitute walnuts for a different flavor)
Parmesan cheese: 1/2 cup, freshly grated
Extra-virgin olive oil: 1/2 cup
Salt: to taste
Recommended Kitchen Gear
Food processor or blender
Measuring cups and spoons
Rubber spatula (for scraping down the sides)
Cheese grater (if grating your own cheese)
Airtight container (for storage)
Directions (How-to Make It)
Prepare the Basil: Rinse the basil leaves in cold water and gently pat them dry with paper towels. Removing as much moisture as possible ensures your pesto will be vibrant and not watered down.
Blend the Ingredients: In the bowl of a food processor or blender, combine the basil leaves, garlic, pine nuts, and a pinch of salt. Pulse until the ingredients are coarsely chopped.
Add the Cheese: Add the grated Parmesan cheese to the mixture and pulse a few times to mix it in.
Emulsify with Olive Oil: With the processor running, slowly drizzle in the olive oil through the feed tube. Continue to process until the pesto reaches your desired consistency. For a thicker pesto, use less oil; for a thinner sauce, add a bit more.
Taste and Adjust: Taste the pesto and adjust the seasoning with additional salt if needed. If the pesto is too thick, you can add a little more olive oil to loosen it.
Store or Serve: Use the pesto immediately with your favorite pasta, or store it in an airtight container in the refrigerator for up to a week. To preserve the vibrant green color, you can place a layer of olive oil on top of the pesto before sealing the container.
Pesto Genovese's fresh, herbal flavors make it a favorite in Italian cuisine and beyond. Whether you're dressing a simple plate of pasta or looking for a flavorful addition to sandwiches and salads, homemade pesto brings a touch of Genoa to your kitchen.
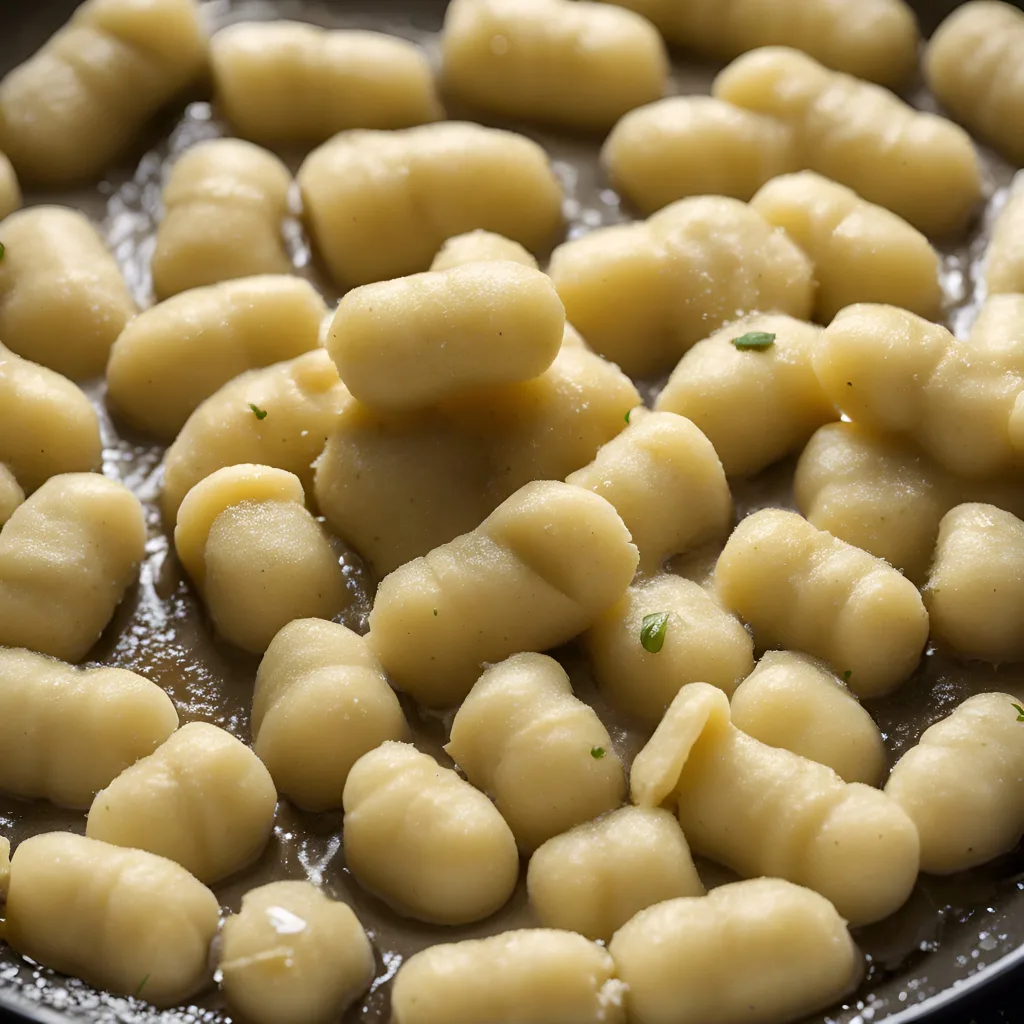
Gnocchi are soft, pillowy dumplings that are a staple in Italian cuisine, offering a delightful alternative to pasta. Made primarily from potatoes, flour, and sometimes egg, these dumplings are known for their light, airy texture when cooked correctly. Gnocchi can be served with a variety of sauces, from a simple sage butter to a hearty ragù, making them versatile and suitable for any season or occasion.
Preparing gnocchi from scratch is a rewarding culinary endeavor that invites you to explore the rustic and comforting side of Italian cooking. Whether you're looking for a comforting meal on a cool evening or wanting to impress guests with your homemade pasta-making skills, gnocchi provides the perfect canvas.
Ingredients Required
Potatoes: 1kg (about 2.2 lbs), preferably starchy varieties like Russets
All-purpose flour: About 2 cups, plus more for dusting
Egg: 1 large (optional, for binding)
Salt: 1 teaspoon, plus more for cooking water
Recommended Kitchen Gear
Large pot for boiling potatoes
Potato ricer or masher
Large mixing bowl
Fork or dough scraper
Knife or pastry cutter
Baking sheet or large tray dusted with flour
Slotted spoon
Directions (How-to Make It)
Cook the Potatoes: Wash the potatoes and boil them whole in salted water until tender, about 20-30 minutes. Drain and let them cool just enough to handle. Peel the potatoes.
Mash the Potatoes: Using a potato ricer or masher, mash the potatoes until smooth. Avoid overworking to prevent the gnocchi from becoming tough.
Make the Dough: On a clean surface, spread the mashed potatoes into a mound and make a well in the center. Sprinkle the flour and salt around and over the potatoes. If using, beat the egg and add it to the center of the well. Gradually incorporate the flour and potato, kneading gently until a soft dough forms. Add more flour if the dough is too sticky, but be sparing to keep the gnocchi light.
Shape the Gnocchi: Divide the dough into sections and roll each into long ropes, about 3/4-inch in diameter. Cut the ropes into 1-inch pieces. If desired, roll each piece over the tines of a fork or a gnocchi board to create ridges.
Cook the Gnocchi: Bring a large pot of salted water to a boil. Cook the gnocchi in batches, dropping them into the water and cooking until they float to the surface, about 2-3 minutes. Use a slotted spoon to transfer them to a colander or plate.
Serve: Serve the gnocchi immediately with your choice of sauce.
Gnocchi offers a comforting, satisfying dish that pairs beautifully with a variety of flavors and ingredients. Whether you choose to dress them with a simple butter and herb sauce or a more complex, savory option, homemade gnocchi will bring a touch of Italian comfort food to your table.